 As we enter the peak of summer, you may be spending more days outside running around and getting sweaty, or you could be sweating just from being in a non-air conditioned room. Although hydration is always important, we are more likely to get dehydrated during the hot summer.
One great way to easily get some water into your body is to eat popsicles! Although many sweet treats can be overloaded with sugar, if you make your own popsicles you can not only control the amount of sugar that goes into them; you can also be sure that they are made from healthful ingredients. You will even save money! And of course both kids and adults love popsicles, not just because they taste good, but because they help cool you down on a hot day.
1. Basic popsicle recipe.
There are many popsicle recipes out there. You can always search on the Web or in cookbooks to see if you can find a recipe that appeals to you. Also, making popsicles is not like baking a cake – it doesn’t have a precise formula of how much of each ingredient you must put in – so you can easily experiment! For instance, adding creamy ingredients such as milk, yogurt, or even avocados adds richness to the flavor.
Here is a simple recipe that is easy to play with. Use this recipe as a starting point for trying out different ingredients. This recipe should make about 6 regular-size popsicles, although it depends on the shapes and sizes of your molds (see below). And don’t forget, your child can help throughout the process!
- 1 cup of diced or pureed fruits (it gives a good texture if you leave some chunks in the puree), such as ripe strawberries, bananas, or kiwis. You can also mix in some vegetables, such as spinach or cucumbers.
- 1 cup of a creamy, liquid ingredient such as yogurt, milk, pureed avocado, pureed cantaloupes, watermelons, etc. You can use juice, but it is better to use whole fruits if possible as they are healthier.
- (Optional) 1 teaspoon of sweetener of your choice, such as honey or maple syrup. Add more as needed. Using ripe fruits helps reduce the need for added sugar/sweetener in your popsicles.
Mix all of the ingredients together and pour the mixture into your popsicle molds. Freeze them for at least 4 hours.
2. Fun popsicle mold ideas.
If you already have popsicle molds, that’s great. But if not, no need to worry – you don’t necessarily have to buy them. Paper cups and popsicle sticks (which you can find in many supermarkets, or as craft sticks in art supply stores) actually work quite nicely. The benefit of using paper cups is that your child can decorate them first, and then make popsicles in them. When she is ready to eat, she can just peel off the paper cup, which adds more fun because it is just like unwrapping a gift! To stabilize the popsicle stick, you can use aluminum foil or plastic wrap to cover the cup, poke a hole in the middle of the foil or wrap and then insert the stick. You can also use muffin cups/pans, ice-cube trays (makes little popsicles!), and even plastic bottles.
3. Try some edible sticks!
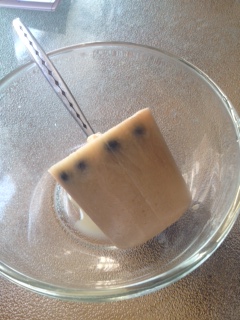
You don’t even have to buy popsicle sticks. You can just use spoons or any other suitable stick that you can find in the kitchen. Better yet, you can make edible popsicle sticks by using carrots, celery, pretzels, etc. You can freeze the “sticks” first if you find it hard to get them to hold up without breaking.
Now go enjoy your yummy popsicles, and stay cool and hydrated in the hot summer! And join us on August’s Tasty Tuesdays and share your own popsicle recipes.


One thought